How To Export Data in Outlook 2016 for Mac
This article explains how to export data from Outlook 2016 for Mac. It provides step-by-step instructions for selecting the folders to export, saving the data as an .olm file, and completing the export process.
Exporting Data in Outlook 2016 for Mac
In this guide, we recommend saving the file as .olm file type as a compatible format on a Mac platform. Follow the steps below to export your data in Outlook.
- Open Outlook 2016 on your Mac desktop.
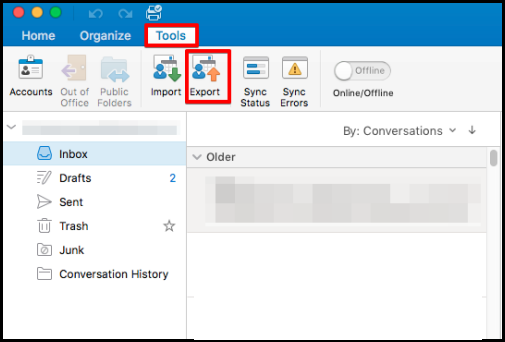
- Go to the Tools tab, then click the Export ribbon option at the top.
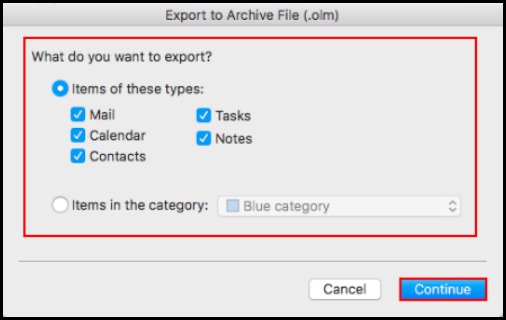
- Select the folders you wish to export from Outlook in an .olm format, then click the Continue button.
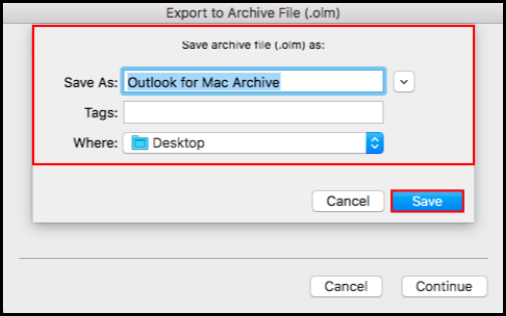
- Enter the name of the file and choose the location of the file you wish to save in your computer, then click Save.
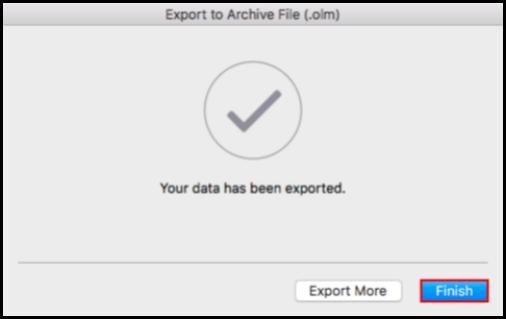
- A confirmation message window will appear confirming that the export process is complete. Click the Finish button.
The next logical step is to import the exported data file in Outlook 2016 for Mac.
IMPORTANT: If you are importing data to a Windows platform, we recommend to convert the .olm data file to a .pst data file type for it to work. Read through this guide to learn how to import data in Outlook 2016 or you can visit our complete list on how to Back up in Outlook in this linked guide.
If you have any questions or need further assistance, please don’t hesitate to contact us here.